Tech tips for musky anglers
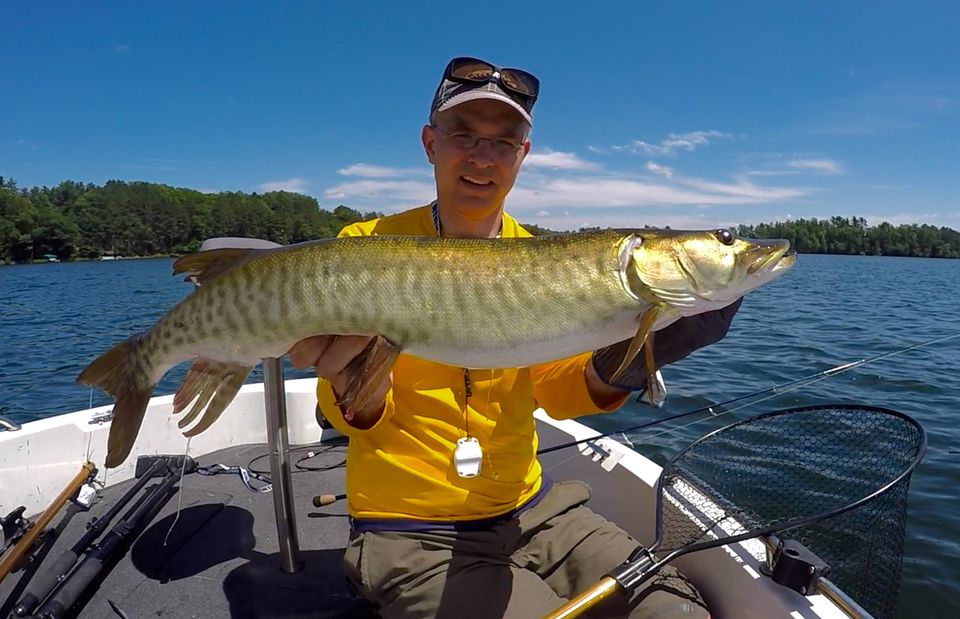
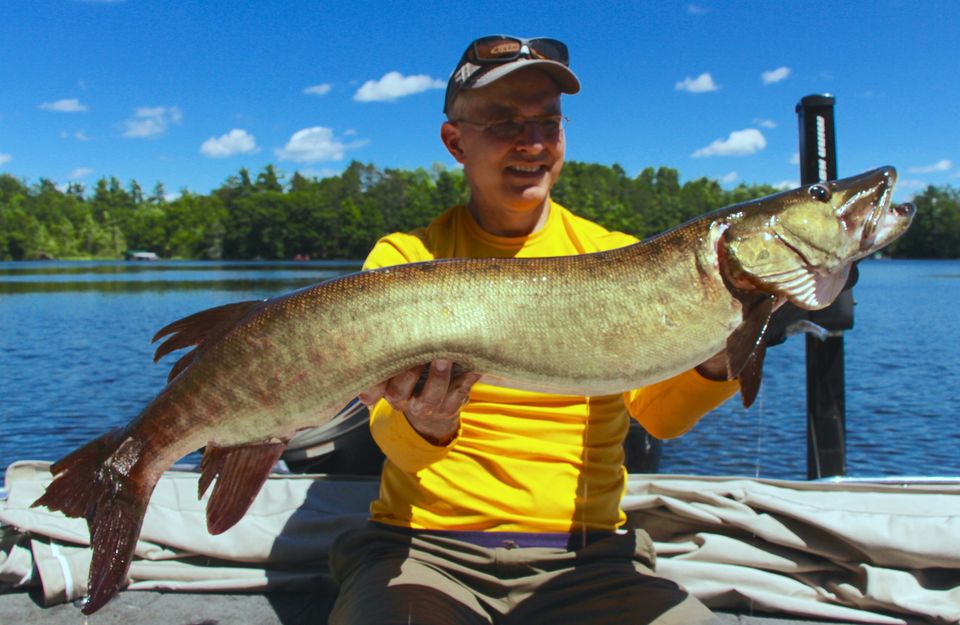
Musky activity peaks in late summer, as warm water temperatures drive these apex predators to feed opportunistically on abundant natural forage, and to aggressively chase anglers’ baits. Full-time musky aficionados frequently drop their paychecks on custom topwaters and giant multi-blade bucktails, study the moon and sun charts, and target trophy waters to get their summer musky fix. Then, there are the rest of us: anglers with families and jobs, who split limited fishing time among several different target species swimming in convenient locations. For us, the musky bug has yet to take complete hold. Nevertheless, we still enjoy the chase, and revel in its success as we lift muskies from the big Frabill net, snap a quick photo and send Esox back to the depths. How can we enjoy consistent summer musky success, without devoting our entire existence to catching them? For me, modern angling technology levels the playing field, and puts summer muskies in the boat when I’m not chasing river smallmouth, cleaning the cabin gutters or pulling the kids on the tube. Here are 5 quick “tech tips” to help you hoist more warm weather muskies this season.
1. Pick your spots. First, get away from the shoreline. You’ll encounter more quality summer muskies on mid-lake structure than you will back in the shallow bays where you found them in the spring. I gravitate towards humps and bars out on the main basin, and rely on the wind to help me pick my spots. Prime locations for me are long bars that run perpendicular to that day’s prevailing wind. I use LakeMaster mapping on my Humminbird HELIX 12 to rapidly identify likely humps and bars, locations that will change based on wind direction.
2. See what’s there.
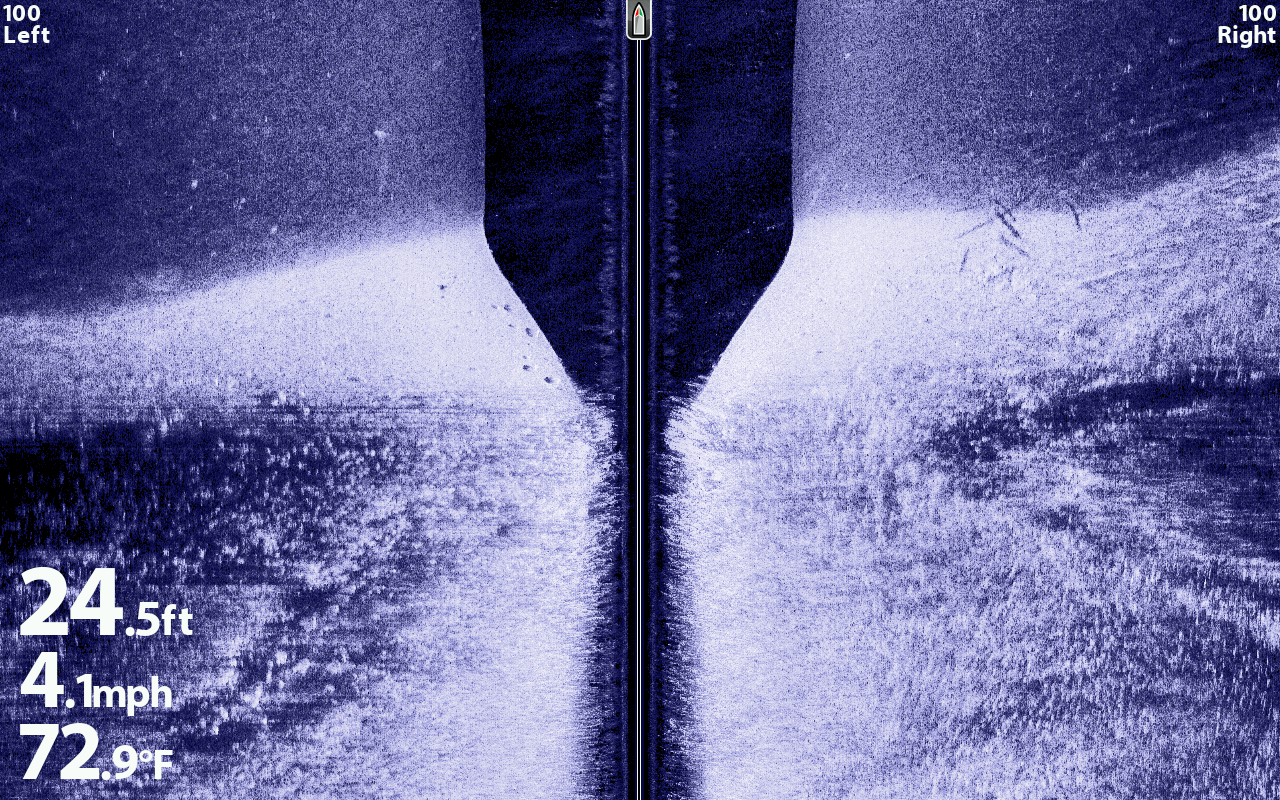
It’s not enough for a bar to be catching the full force of the wind; that bar needs some cover to hold forage and conceal muskies. Rocks are good. Weeds are better. Weeds and rocks together are great. I use the Side Imaging sonar on my Humminbird HELIX 12 to quickly identify these prime fish-holding areas. The picture-like image quality of Humminbird Side Imaging takes the guesswork out of identifying different cover types, which helps me to train my focus on musky-holding cover and avoid the barren desert.
3. Use your eyes, too.
Nothing beats visual confirmation of the new micro-spot that you’ve just identified with Side Imaging. One of the most powerful and versatile tools in my fish finding arsenal, for both soft and hard water, is my Aqua-Vu Micro camera system. A quick peek at the underwater world, courtesy of Aqua-Vu’s high quality optics, allows me to fish with confidence, knowing that I am indeed targeting the right areas for the right fish. Beyond using the Aqua-Vu Micro camera to probe structure, I frequently rely on the same system to confirm the identities of fish that I see in these same areas. On many of the lakes I frequent, muskies rely on panfish and related species for summer forage; visually identifying snack-sized sunnies and crappies with my Aqua-Vu Micro camera tells me that the buffet is set for Esox.
4. Position yourself for success. You’ve just identified the textbook spot-on-the-spot on a prime midlake bar. This is not the time to cruise around, flinging baits to low percentage areas. In summer, I prefer to position my boat adjacent to my target weed/rock interface and lock it in place, so I can saturate that zone with a variety of baits. The last thing I want when chasing muskies is an anchor rope in the water, as a hooked fish will invariably find and use that rope to secure its freedom. Rather, I position my boat using two tech tools: the Spot Lock feature of my Minn Kota Ulterra’s i-Pilot Link system locks in the bow, and my Minn Kota Talon secures the stern. Using only one of these boat positioning tools would still allow the boat to pivot and swing in the strong summer winds that activate midlake structure; however, the Spot Lock/Talon combination provides for an incredibly stable, stationary platform for hucking baits and landing fish. I orient the boat with the bow into the wind, generally over the deeper water surrounding the target bar. The 12-foot Talon on the stern reaches down far enough to find the edge of the bar, locking the back of the boat in place. The rough water feature of my Talon frequently gets a workout in the summer, as nothing gets midlake structure going more than a stiff breeze and the steady chop that it generates.
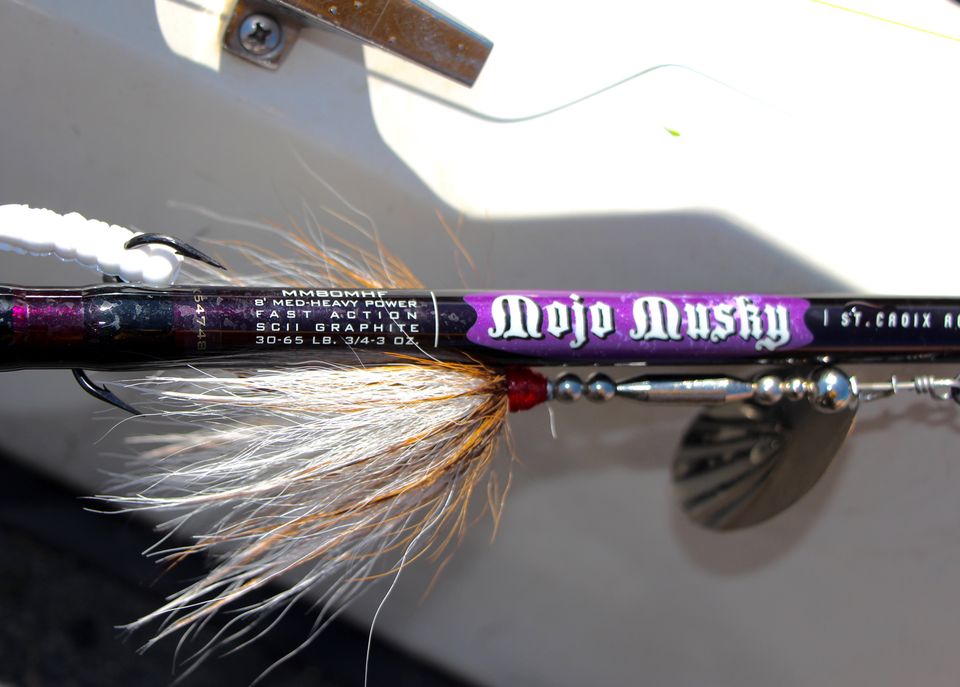
5. Get your Mojo on. Technique-specific rods are all the rage. I admit, I have rods in my walleye collection that I only use for live bait rigging, others only for slip bobbering, and still others for each of a variety of jig-based presentations. My musky rod collection, however, relies on a “generalist” rather than a host of specialist rods. The rod that I reach for, every time, is my 8 foot Mojo Musky (MM80MHF) from St. Croix Rod. Relying on a generalist rod doesn’t mean that I have to compromise on features or functionality. Whether I’m slow rolling a spinnerbait through the weeds, going over the top of the weeds with a Cowgirl, or riding the waves with a topwater, my Mojo Musky handles each presentation with the precision and toughness that summer muskies demand. The Mojo Musky’s eight-foot length allows me to transition into a figure 8 with ease, and the modest weight of the rod doesn’t leave me fatigued after chasing Esox for the day. My Mojo Musky is an important, final piece of my hi-tech solution to the summer musky puzzle.
New Paragraph
New Paragraph
Summer musky prime time has arrived. This is the time of the season with the musky can truly be an “everyman’s fish”, as for these few weeks, complete devotion to all things Esox is not necessarily required for success. Use these tech tips to level the musky playing field, and be sure to smile for those musky “grip-and-grin” photos that are destined for your desk at work and your Facebook profile. Those memories will keep the musky flame burning bright until summer returns next year!
NOW AVAILABLE!
If you want to learn to interpret your sonar display, or how to optimize your Side Imaging, Down Imaging, and 2D sonar views, then you need our new instructional title:
The Angler's Guide to Sonar Interpretation
Your comprehensive guide to interpreting Side Imaging, Down Imaging, and 2D sonar. Quickly and confidently identify natural and man-made structure and fish. Cross-check your sonar interpretation skills with Aqua-Vu underwater video. Optimized for Humminbird but works with ANY fishfinder!